
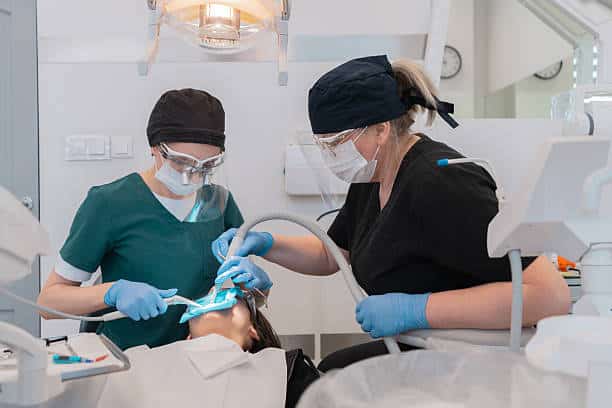
Dental sterilization procedures are the steps dental teams use to prepare reusable instruments for safe patient care. Dental assistants learn how instruments are collected, cleaned, inspected, packaged, sterilized, monitored, and stored. Each step helps prevent cross-contamination and protect patients.
Sterilization is more than running an autoclave, the steam sterilizer many dental offices use. It’s one stage in a larger process called instrument reprocessing, which ends with monitoring to confirm the process worked. If you’re considering a dental assisting career, understanding the full workflow is part of becoming a dependable team member.
At Bartram Dental Assisting School, our dental assisting program in the Jacksonville area introduces sterilization and infection control early in the program. You learn each step through hands-on practice inside a working dental office, with experienced instructors guiding you.
What Are Dental Sterilization Procedures in a Dental Office?
In dentistry, sterilization is a validated process that destroys all forms of microbial life, including bacterial spores. Dental offices use it on reusable instruments that become contaminated during patient care.
Sterilization is only one part of instrument reprocessing. Cleaning, inspection, packaging, monitoring, and storage are separate steps, and each one affects whether an instrument is safe to use.
Why Dental Instruments Must Be Sterilized Between Patients
During treatment, instruments contact saliva, blood, oral tissues, and other potentially infectious materials. Without proper reprocessing, microorganisms could pass from one patient to the next. That’s why reprocessing happens after every patient, not just at the end of the day.
Common examples include explorers, mouth mirrors, periodontal instruments, extraction forceps, and reusable handpieces. The right processing method depends on each instrument’s classification and the manufacturer’s instructions.
What Is the Difference Between Cleaning, Disinfection, and Sterilization?
These three terms are related, but they aren’t interchangeable.
| Cleaning | Disinfection | Sterilization | |
| Definition | Physical removal of debris and organic material | Eliminates many or most harmful microorganisms, depending on the product and its intended use, but not necessarily spores | A validated process that destroys all microbial life |
| Purpose | Prepares instruments for sterilization | Reduces contamination on surfaces and certain items | Makes instruments safe for patient contact |
| Typical application | Every reusable instrument before processing | Countertops, equipment surfaces, some noncritical items | Critical and heat-tolerant semicritical instruments |
Cleaning always comes first. Debris left on an instrument can shield microorganisms from the sterilizing agent. Surface disinfection and instrument sterilization are never substitutes for each other.
Why Sterilization Is an Essential Dental Assistant Skill
Dental assistants often help manage instrument reprocessing. Key responsibilities include:
- Recognizing contaminated instruments
- Following established reprocessing protocols
- Keeping clean and contaminated work areas separate
- Wearing appropriate PPE
- Keeping instrument workflows organized
- Spotting potentially compromised packages
- Reporting equipment or processing concerns
Each task requires training and close adherence to office protocols. Assistants who understand why each step exists are better prepared to catch problems before an instrument reaches a patient.
Which Dental Instruments Need Sterilization? Understanding Critical, Semicritical, and Noncritical Items
Dental teams use a risk-based classification system for dental infection prevention. It sorts instruments by how they contact the patient, and that contact determines how they’re processed.
| Classification | Contact or use | General processing approach |
| Critical | Penetrates soft tissue or bone | Heat sterilization |
| Semicritical | Contacts mucous membranes or nonintact skin | Heat sterilization when heat-tolerant; approved alternatives for certain heat-sensitive devices |
| Noncritical | Contacts intact skin | Cleaning and appropriate disinfection as indicated |
Critical instruments penetrate soft tissue or bone, giving microorganisms a direct path into the body. Surgical instruments and periodontal scalers are common examples, and they carry the highest infection risk. Semicritical items, such as mouth mirrors and reusable impression trays, contact mucous membranes or nonintact skin. Most heat-tolerant semicritical instruments are also heat sterilized, while heat-sensitive items follow applicable guidance and validated manufacturer instructions.
Noncritical items touch only intact skin, such as a blood pressure cuff or the outside of an X-ray tubehead. They need cleaning and disinfection, not autoclaving. Environmental surfaces like countertops follow a separate surface-cleaning routine. Classifying instruments correctly starts with being able to recognize instruments by name and function.
Why Dental Handpieces Require Special Reprocessing Attention
CDC recommends heat sterilizing reusable handpieces and their attachments between patients. Fluids and debris can enter internal parts during use, and wiping the outside doesn’t reach that contamination. Florida’s Board of Dentistry rule also requires heat-based sterilization of handpieces after each use. Handpiece cleaning and lubrication follow device-specific instructions.
Dental Instrument Sterilization Procedures: Step-by-Step From Collection to Storage
Instrument reprocessing follows a set order: collection, transport, cleaning, rinsing and drying, inspection, packaging, sterilization, monitoring and release, and storage.
Sterilization areas are usually divided into zones for receiving and cleaning, packaging, sterilization, and sterile storage. Instruments move in one direction, from contaminated zones toward clean and sterile ones. Clear labels and team communication keep instruments at different stages from mixing.
This is an educational overview. Exact settings and handling steps depend on equipment instructions and office protocols. Students practice the sequence during hands-on dental assistant training.
Step 1: Collecting and Transporting Contaminated Instruments
After treatment, used instruments go straight into the reprocessing workflow with minimal handling. They travel in covered, puncture-resistant, leak-proof containers, kept separate from clean supplies. Keeping sharps contained reduces injury risk.
Step 2: Cleaning Dental Instruments Before Sterilization
Blood, saliva, and debris must come off first. Leftover material can shield microorganisms from the sterilizing agent. Florida’s rule requires this step. Offices use manual or automated cleaning, and trained staff follow validated manufacturer instructions for each instrument.
Step 3: Using Ultrasonic Cleaners and Washer-Disinfectors
An ultrasonic cleaner uses sound waves in a cleaning solution to loosen debris. A washer-disinfector cleans and disinfects instruments in an automated cycle. Both reduce hand contact with sharp, contaminated instruments. Neither one sterilizes.
Step 4: Rinsing, Drying, and Inspecting Dental Instruments
Assistants rinse and dry instruments according to the manufacturer’s instructions. Rinsing removes cleaning residue, and drying helps prevent corrosion and wet packages. Each instrument is then inspected for leftover debris, corrosion, or damage. Anything that needs more cleaning goes back a step, and damaged instruments are set aside. Inspection works as a built-in quality check.
Step 5: Packaging Instruments for Dental Sterilization
Pouches, wraps, and approved cassettes let the sterilizing agent reach the instruments. They also protect sterility after processing. Assistants seal each package correctly and label it with details like the date and sterilizer used. Labels make it possible to trace a package if a problem appears later. Most packages also include a chemical indicator, covered in the monitoring section below.
Step 6: Sterilizing Dental Instruments in an Autoclave
An autoclave uses pressurized steam under validated conditions to sterilize compatible instruments. Steam must reach every surface at the right temperature and pressure for enough time. Correct loading makes that possible. Cycle settings vary by sterilizer, instrument, and packaging, so assistants follow the manufacturer’s instructions.
Some offices also use dry heat sterilizers, which rely on hot air instead of steam. Each method has its own compatibility and processing requirements. Offices also maintain sterilizers according to the manufacturer’s instructions, since poorly maintained equipment is more likely to fail a cycle.
Step 7: Checking Sterilization Results Before Instruments Are Released
A finished cycle doesn’t automatically mean the load is ready. Assistants check the sterilizer’s readings and chemical indicators before releasing instruments. Biological monitoring follows the office’s testing schedule. Any failed result triggers the office’s corrective-action procedure.
Step 8: Storing Sterilized Dental Instruments Safely
Sterile packages belong in a clean, dry, enclosed area, away from sinks, floors, and splash zones. Wet, torn, or punctured packages must be reprocessed before use. Some offices use event-related storage, meaning a package stays usable until something damages or compromises it. Others also date packages and use older stock first. Office policy determines the approach.
How Do Dental Assistants Know Whether Sterilization Was Successful?
Sterilization monitoring uses three types of evidence. Each checks something different, and no single indicator proves sterility on its own.
| Monitoring type | What it evaluates | Common example |
| Mechanical | Cycle conditions | Sterilizer display or printout |
| Chemical | Exposure to specified processing conditions | Indicator strip |
| Biological | Sterilization effectiveness using resistant spores | Spore test |
Mechanical Monitoring: Time, Temperature, and Pressure
Sterilizer displays, gauges, and printouts show cycle time, temperature, and pressure. Assistants check these for every load. Recording them helps offices spot equipment problems early.
Chemical Indicators: Sterilization Tape, Strips, and Pouch Markings
Chemical indicators change color when exposed to specific sterilization conditions. Sterilization tape and pouch markings are common external indicators, while indicator strips often go inside packages. An internal indicator is used inside each package, and an external one is added when the internal indicator can’t be seen. A color change shows exposure, not that every microorganism was destroyed.
Biological Indicators: What Is a Dental Sterilizer Spore Test?
Biological monitoring, also called spore testing, uses highly resistant bacterial spores to check whether the sterilizer is killing microorganisms. Unlike a chemical indicator, a spore test is incubated afterward to see whether any spores survived. The CDC’s infection prevention recommendations for dental settings call for biological monitoring at least weekly. Loads containing implantable devices have additional requirements.
The state also sets its own minimum. Florida’s sterilization and disinfection rule requires biological monitoring of steam sterilizers. Testing must happen at least every 40 hours of use or every 30 days, whichever comes first.
What Happens When a Dental Sterilization Test Fails?
A failed result must be reported right away. General principles include:
- Keep instruments from the questionable load out of use
- Follow the office’s written protocol
- Notify the responsible clinician or infection-control coordinator
- Check for equipment or processing problems
- Determine whether instruments need recall or reprocessing
Why Dental Offices Keep Sterilization Logs and Records
Records support traceability and quality assurance by connecting each load to its results. Common entries include the sterilizer ID, cycle number, date, monitoring results, and maintenance. If a problem occurs, records help identify which instruments were affected.
What PPE and Safety Precautions Do Dental Assistants Use During Instrument Sterilization?
Reprocessing can expose you to blood, saliva, chemicals, and sharp edges. Standard precautions and task-appropriate PPE reduce those risks.
Protective Equipment and Sharps Safety
Puncture-resistant utility gloves protect your hands during instrument cleaning because they’re tougher than exam gloves. Masks, eye protection or face shields, and protective clothing guard against splashes. Covered transport, controlled handling, and automated cleaning all help prevent sharps injuries.
Chemical Safety and Exposure Response
Handling cleaning agents safely means following product labels, safety data sheets, and ventilation guidance, along with wearing the right PPE. If an exposure happens, report it immediately and follow the office’s exposure-control plan. Offices should have procedures for evaluating exposures. Prompt reporting matters because some follow-up steps are time-sensitive.
Common Dental Sterilization Mistakes New Assistants Should Learn to Avoid
Many reprocessing mistakes happen when a step is rushed or skipped. Each one below explains what the mistake looks like, why it matters, and what to do instead.
Skipping or Rushing Instrument Cleaning
Rushing often means missing debris in hinges, serrations, or other hard-to-reach areas. Any debris left behind can interfere with sterilization. A sterilizer can’t make up for poor cleaning.
Overloading the Dental Autoclave
Packing extra instruments into one cycle can stop steam from circulating around every package. Some instruments may not reach sterilizing conditions. Follow the manufacturer’s loading instructions, even on busy days.
Using Incorrect Packaging or Improperly Sealed Pouches
The wrong pouch, wrap, or seal can block the sterilizing agent during the cycle. A poor seal can also let contamination in afterward. Packaging integrity matters both during and after processing.
Ignoring Failed Sterilization Indicators
Releasing a load after an indicator shows a problem puts patients at risk. Indicators are quality-control tools, not formalities. Instruments from a questionable load stay out of use until the concern is resolved.
Storing Sterile Instruments in Contaminated or Damp Areas
Storing packages near sinks or in damp cabinets lets moisture weaken them. Wet or damaged packaging no longer protects the instruments inside. Any compromised package goes back through processing.
Reusing Single-Use Dental Instruments
Single-use items are designed for one patient and aren’t built to withstand reprocessing. Reusable instruments are made to be cleaned and sterilized repeatedly. Check the label, and remember that Florida’s rule allows disposable items to be used only once.
How Do Dental Assisting Students Learn Sterilization Procedures During Hands-On Training?
Students build sterilization skills through a gradual sequence that moves from classroom concepts to supervised practice:
- Infection-control concepts
- Instrument recognition
- Workflow demonstration
- Supervised equipment practice
- Monitoring awareness
- Simulated dental-office workflow
Each stage builds on the one before it, so students understand the risks before they handle contaminated instruments.
Learning Infection Control Before Handling Instruments
Training starts with how contamination spreads, along with standard precautions, PPE, and instrument classifications. That foundation makes later hands-on practice safer and easier to understand.
Practicing Reprocessing Steps, Equipment, and Documentation
With instructor supervision, students practice safe handling, instrument identification, inspection, and packaging. Equipment demonstrations show how each processing stage works before students take part. Learning to read chemical indicators, spore test results, and sterilization records helps students understand when a load is safe to use.
Connecting Sterilization With Chairside Work and Externships
Processed instruments move from sterile storage into the operatory for patient care. Assistants open packages chairside and check the internal indicator before use. From there, sterilization connects directly to operatory setup, instrument transfer, and four-handed dentistry. Externships then show how real offices apply their own protocols, and responsibilities vary by placement.
What Should Dental Assisting Students in Florida Know About Sterilization and Infection-Control Responsibilities?
Whether you train in Jacksonville or elsewhere in Florida, you’ll work within professional, workplace, and infection-control requirements. Sterilization duties are separate from expanded-functions certification.
Are Dental Assistants Responsible for Sterilizing Instruments in Florida?
Trained dental assistants may be assigned reprocessing duties under office policy. Specific responsibilities depend on training, employer protocols, and applicable rules. Our guide to Florida dental assistant requirements covers the broader picture.
How Do CDC and OSHA Guidance Relate to Dental Assistant Training?
The CDC issues infection-prevention recommendations for dental settings. OSHA enforces workplace safety requirements that protect employees, including OSHA’s Bloodborne Pathogens Standard. CDC recommendations aren’t federal law on their own, though Florida’s rule adopts CDC guidelines by reference for certain procedures.
Why Florida Dental Assistants Need Ongoing Infection-Control Training
Equipment, products, and manufacturer instructions change over time, and office policies can shift after new equipment arrives. Ongoing training helps assistants keep their skills accurate and consistent. Many do this through continuing education for dental assistants in Florida.
How Does Bartram Dental Assisting School Introduce Sterilization and Safety?
Our 10-week program introduces sterilization early. Week 2 covers disease transmission, sterilization and disinfection control, and hazard management. That same week covers four-handed dentistry and instrument transfer, so students see how infection control supports chairside work. Week 7 returns to sterilization procedures, and Week 8 covers OSHA and bloodborne pathogens. Classes meet on Saturdays at our school in St. Johns County.
Dental offices value assistants who follow reprocessing protocols consistently. Patient safety is a shared team responsibility, and organized instrument processing keeps clinical work running smoothly. New assistants also need to recognize when an instrument isn’t ready for use and report it.
Frequently Asked Questions About Dental Sterilization Procedures
What is the most common method of sterilizing dental instruments?
Steam sterilization in an autoclave is the most widely used method for compatible dental instruments. It uses saturated steam under pressure to destroy microorganisms, including spores. Offices rely on it because it’s dependable, relatively fast, and works for many heat-tolerant metal instruments. Heat-sensitive items may need a different approved method.
Do dental assistants need to know how to use an autoclave?
Yes, if they’re assigned reprocessing duties. Understanding loading, cycle selection, and indicator checks helps assistants follow office protocols correctly. Every office uses its own equipment, so new assistants also receive office-specific instruction. Training gives you the foundation to learn each new system with confidence.
Is sterilization taught in dental assistant school?
Infection control and instrument processing are core subjects in many dental assisting programs, but curricula vary. Ask each school when sterilization is taught and how much hands-on reprocessing practice students get. Look for supervised practice, not only lectures. Training inside a working dental office can also show you how a real sterilization area is organized.
Is dental sterilization difficult for beginners to learn?
Sterilization takes attention to detail more than advanced skill. The steps follow a set order, and each one matters. Beginners learn by practicing the sequence with instructor feedback until following the protocol becomes routine. Slowing down and double-checking each step matters more than speed.
Do dental assistants in Florida need a separate sterilization certification?
Florida’s sterilization rule sets requirements for how dental offices process instruments. It doesn’t describe a separate sterilization credential for assistants. Sterilization training is also different from credentials like Florida’s dental radiography certification. Rules can change, so confirm current requirements with the Florida Board of Dentistry.
Learn Dental Sterilization and Infection-Control Skills at Bartram Dental Assisting School in Jacksonville, FL
Sterilization knowledge builds infection-control awareness. That awareness shapes how you handle instruments safely. Hands-on practice then turns those concepts into steady habits you can bring into a dental office. Whether you’re starting your first healthcare career or changing fields, these skills give you a practical foundation.
Students in the Jacksonville area can explore the 10-week dental assisting program. The program pairs sterilization training with chairside assisting, radiography, and other clinical subjects.
If you have questions first, our admissions team can answer questions about upcoming session dates. When you feel ready, you can start your dental assisting application.

